
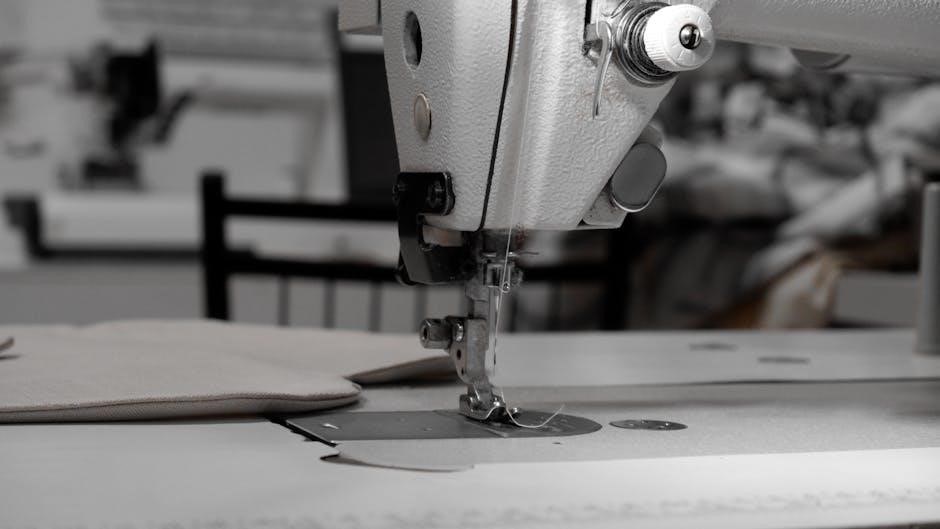
seam guide on sewing machine
A seam guide is an essential sewing machine accessory designed to help sewists achieve straight, precise stitching. It simplifies sewing by guiding fabric evenly, ensuring professional results.
1.1 What is a Seam Guide?
A seam guide is a tool attached to a sewing machine to help maintain consistent seam allowances. It ensures fabric aligns properly, aiding in straight, precise stitching. Available in magnetic or ruler forms, it attaches near the presser foot, guiding the fabric edge for uniform results. This accessory is invaluable for achieving professional-looking seams in various sewing projects.
1.2 Importance of Using a Seam Guide in Sewing
Using a seam guide ensures accurate and consistent stitching, enhancing the quality of your sewing projects. It helps maintain uniform seam allowances, reducing errors and saving time. This tool is especially beneficial for beginners, as it simplifies sewing straight lines and achieving professional-looking results. It also prevents fabric misalignment, making sewing more efficient and precise.
Types of Seam Guides for Sewing Machines
Seam guides come in various forms, including magnetic, ruler-based, and adjustable options. Each type offers unique benefits, such as ease of use, precise measurements, and versatility for different projects;
2.1 Magnetic Seam Guide
A magnetic seam guide attaches directly to the sewing machine’s throat plate, offering precise alignment. It’s ideal for maintaining consistent seam allowances and sewing straight lines effortlessly. Its strong magnetic grip ensures stability, making it a favorite among sewists for various projects, from garments to home decor. Easy to install and adjust, it enhances sewing accuracy and efficiency.
2.2 Ruler-Based Seam Guide
A ruler-based seam guide features marked measurements, helping sewists maintain precise seam allowances. It attaches to the sewing machine, offering a visual reference for aligning fabric edges. This tool is especially useful for projects requiring exact measurements, such as quilting or home decor. Its adjustable design allows customization, ensuring consistent results and enhancing sewing accuracy for various fabric types and sewing tasks.
2.3 Adjustable Seam Guide
An adjustable seam guide offers flexibility for various projects, allowing sewists to customize the seam allowance. It easily attaches to the sewing machine and can be moved to accommodate different fabric widths. This feature is particularly useful for both beginners and experienced sewists, ensuring consistent stitching and professional finishes for a wide range of sewing tasks and fabric types.
How to Attach and Use a Seam Guide
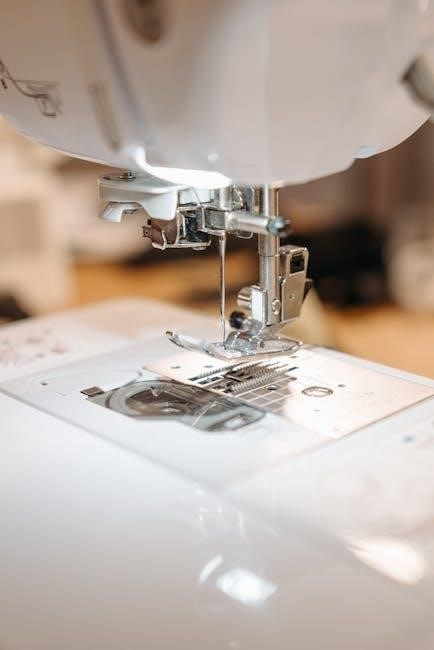
Place the seam guide on the needle plate, aligning it with the presser foot. Adjust as needed for precise stitching, ensuring straight lines and even fabric flow.
3.1 Step-by-Step Instructions for Attaching the Seam Guide
Loosen the screw on the back of the presser foot. Position the seam guide on the needle plate, aligning it with the presser foot. Slide the guide through the foot’s opening and tighten the screw securely. Set the desired seam allowance and test by sewing a straight line on scrap fabric to ensure accuracy.
3.2 Adjusting the Seam Allowance
Set your desired seam allowance by sliding the seam guide left or right on the needle plate. Use a ruler or gauge to measure accurately. Secure the guide firmly to maintain consistency. Test the adjustment by sewing a straight line on scrap fabric to ensure precise stitching. Always refer to your machine’s manual for specific adjustment instructions.
3.3 Tips for Sewing Straight Lines
Use the seam guide to maintain consistent fabric tension and alignment. Start sewing slowly, keeping the fabric edge aligned with the guide. Avoid pulling fabric forcefully, as this can distort the seam. Use a steady, smooth motion and ensure the guide is securely attached. Practice on scrap fabric to perfect your technique before working on actual projects.
Maintaining and Caring for Your Seam Guide
Regularly clean the seam guide with a soft cloth to remove dust and debris. Store it in a dry place to prevent rust and damage.
4.1 Cleaning the Seam Guide
Regular cleaning ensures optimal performance. Use a soft, dry cloth to wipe away dust and debris. Avoid harsh chemicals or abrasive materials that could damage the surface. For magnetic guides, gently remove any fabric residue with a damp cloth, then dry thoroughly to maintain magnetic strength. Periodic cleaning prevents buildup and ensures accuracy in your sewing projects.
4.2 Storing the Seam Guide
Store your seam guide in a dry, cool place, away from direct sunlight and magnetic fields to preserve accuracy. Use a protective case or pouch to prevent dust and damage. Keep it organized in your sewing kit to avoid misplacement. Ensure the guide is clean and dry before storage for optimal effectiveness and extended lifespan, ensuring reliability for future projects.
Choosing the Right Seam Guide for Your Sewing Machine
Ensure compatibility with your machine’s make and model. Select a seam guide type that suits your project needs, whether magnetic, ruler-based, or adjustable for versatility and precision.
5.1 Compatibility with Your Machine
Ensure the seam guide is compatible with your sewing machine’s brand and model. Magnetic guides work on metal needle plates, while others may attach with screws or clips. Check if the guide suits domestic or industrial machines. Always refer to your machine’s manual for specific compatibility. Proper fit ensures seamless performance and avoids interference with fabric movement.
5.2 Selecting the Right Type for Your Project
Choose a seam guide based on your project needs. Magnetic guides are ideal for straight stitching, while ruler-based guides offer precise measurements for quilting or seams. Adjustable guides are versatile for varying fabric types and seam allowances. Consider the project’s complexity and fabric type to ensure the best results and ease of use.
Common Mistakes to Avoid When Using a Seam Guide
Common mistakes include improper alignment, ignoring fabric type, and not adjusting seam allowances. These errors can lead to uneven stitching and inaccurate results, so attention is crucial.
6.1 Improper Alignment
Improper alignment is a common issue where the seam guide is not positioned correctly relative to the presser foot or needle. This can lead to uneven stitching or fabric drifting. To avoid this, ensure the guide is parallel to the presser foot and aligned with the edge of the fabric. Always test alignment before sewing to maintain accuracy and prevent mistakes.
6.2 Ignoring Fabric Type
Ignoring fabric type can lead to poor results when using a seam guide. Thicker fabrics may require adjusting the guide’s distance from the needle, while slippery fabrics might need additional stabilization. Failing to account for fabric type can result in uneven stitching or misalignment. Always test the guide on scrap fabric of the same type before starting your project to ensure accuracy and prevent errors.
Advanced Techniques for Using a Seam Guide
Advanced techniques involve using specialty feet for precise stitching and incorporating seam gauges for complex projects, ensuring accuracy and versatility in your sewing endeavors.
7.1 Sewing with Specialty Feet
Specialty feet, like rolled hem or zigzag feet, enhance seam guide functionality. They help maintain consistent seam allowances and fabric alignment, ensuring precise stitching for decorative edges, hems, and intricate designs.
7.2 Achieving Precise Stitching
Using a seam guide ensures consistent stitching accuracy. Align the guide with the fabric edge, adjust the seam allowance, and maintain steady fabric flow. This technique helps in achieving professional-grade results, especially for straight lines and intricate patterns. Proper alignment and consistent feeding are key to precise stitching outcomes.
Tips for Beginners
Start with basic projects and practice on scrap fabric to build confidence. Use the seam guide to maintain straight lines and consistent stitching from the beginning.
8.1 Starting with Basic Projects
Begin with simple projects like straight-line seams or small pouches to familiarize yourself with the seam guide. Practice on scrap fabric to understand how the guide helps maintain straight lines and consistent stitching. Start with easy tasks to build confidence and develop your sewing skills gradually. This approach ensures a smooth learning curve for beginners.
8.2 Practicing with Scrap Fabric
Practicing with scrap fabric helps you master the seam guide without wasting material. Start by sewing straight lines to get a feel for how the guide directs the fabric. Experiment with different seam allowances and stitch lengths to understand their effects. This hands-on practice builds muscle memory and confidence, preparing you for more complex projects.
Troubleshooting Common Issues
Identify misalignment by checking the seam guide’s position. Adjust for fabric thickness and type to prevent uneven stitching. Ensure the machine is threaded correctly and the guide is securely attached.
9.1 Fabric Not Feeding Properly
Fabric not feeding smoothly? Check if the seam guide is properly aligned with the edge of the fabric. Ensure the presser foot is lowered and adjusted correctly; Use a walking foot or Teflon foot for thick or slippery fabrics. Clean the machine’s feed dogs and ensure they are functioning. Verify the fabric is not bunched or folded unevenly.
9.2 Uneven Stitching
Uneven stitching can occur if the seam guide is misaligned or the fabric isn’t fed smoothly. Check the guide’s position and adjust it to match your fabric’s edge. Ensure the machine’s tension is balanced and the correct needle size is used. For thick or stretchy fabrics, consider using a walking foot. Clean the machine and oil it if necessary to maintain consistent stitch quality.
The seam guide is an indispensable tool for achieving professional sewing results. Mastery of its use ensures precise stitching and enhances overall sewing efficiency. Practice consistently for optimal outcomes.
10.1 Summary of Key Points
A seam guide enhances sewing precision by maintaining consistent seam allowances and straight stitching. Available in magnetic, ruler-based, and adjustable types, it suits various projects. Proper attachment and alignment are crucial for accurate results. Regular cleaning and storage prolong its durability. Choosing the right guide for your machine and fabric type ensures optimal performance. Avoid common mistakes like improper alignment and fabric neglect for professional outcomes. Mastery of the seam guide elevates sewing efficiency and quality, making it a vital tool for sewists of all skill levels.
10.2 Final Tips for Mastering the Seam Guide
Practice regularly to build muscle memory for precise stitching. Experiment with different fabric types to understand how the guide performs. Keep the guide clean and well-maintained for optimal accuracy. Combine it with specialty feet for advanced techniques. Start with simple projects and gradually tackle complex designs. Consistency and patience are key to mastering the seam guide effectively.